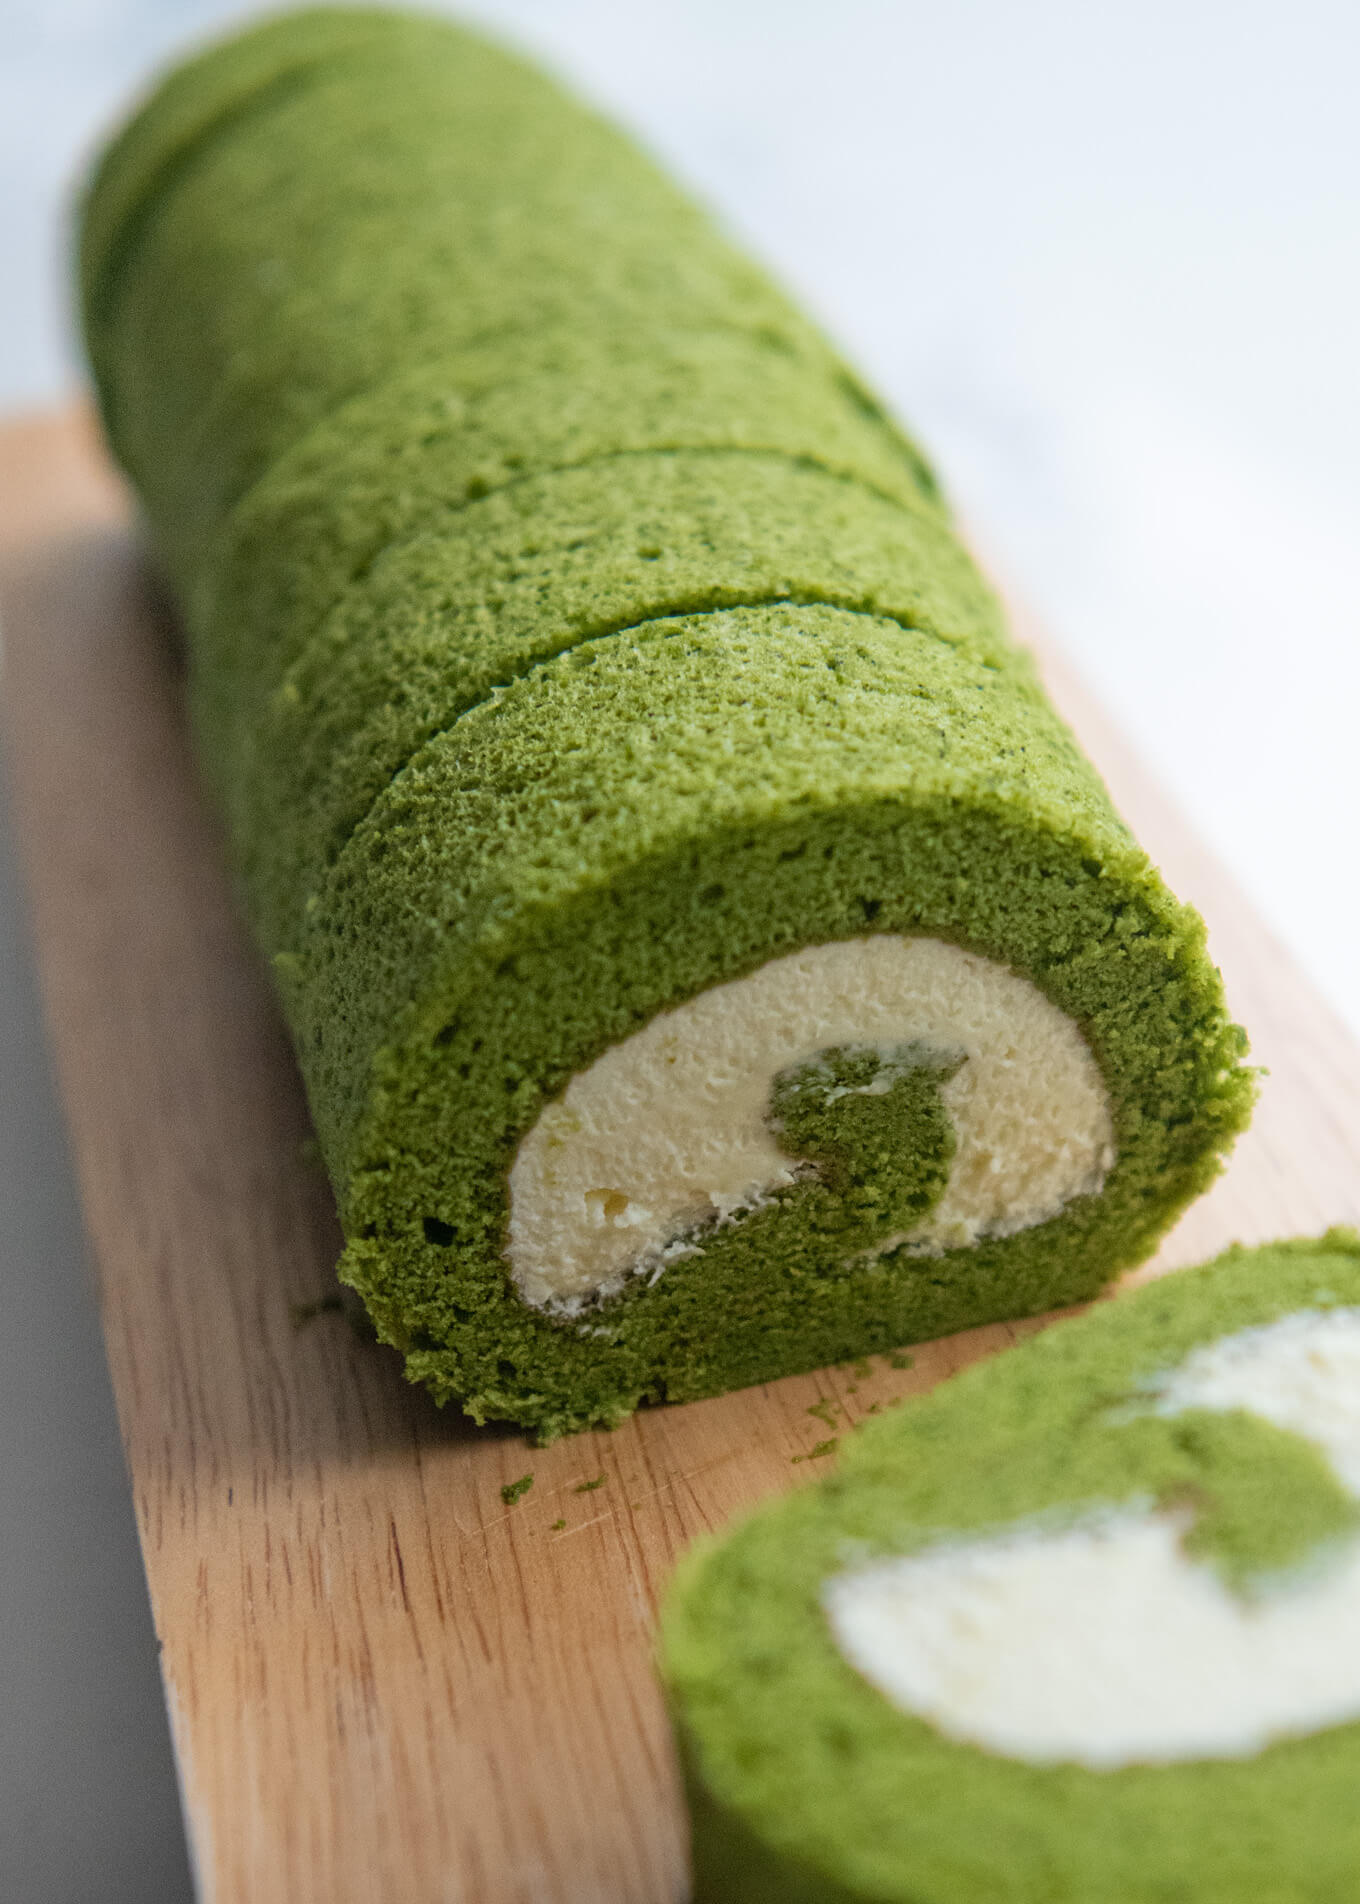
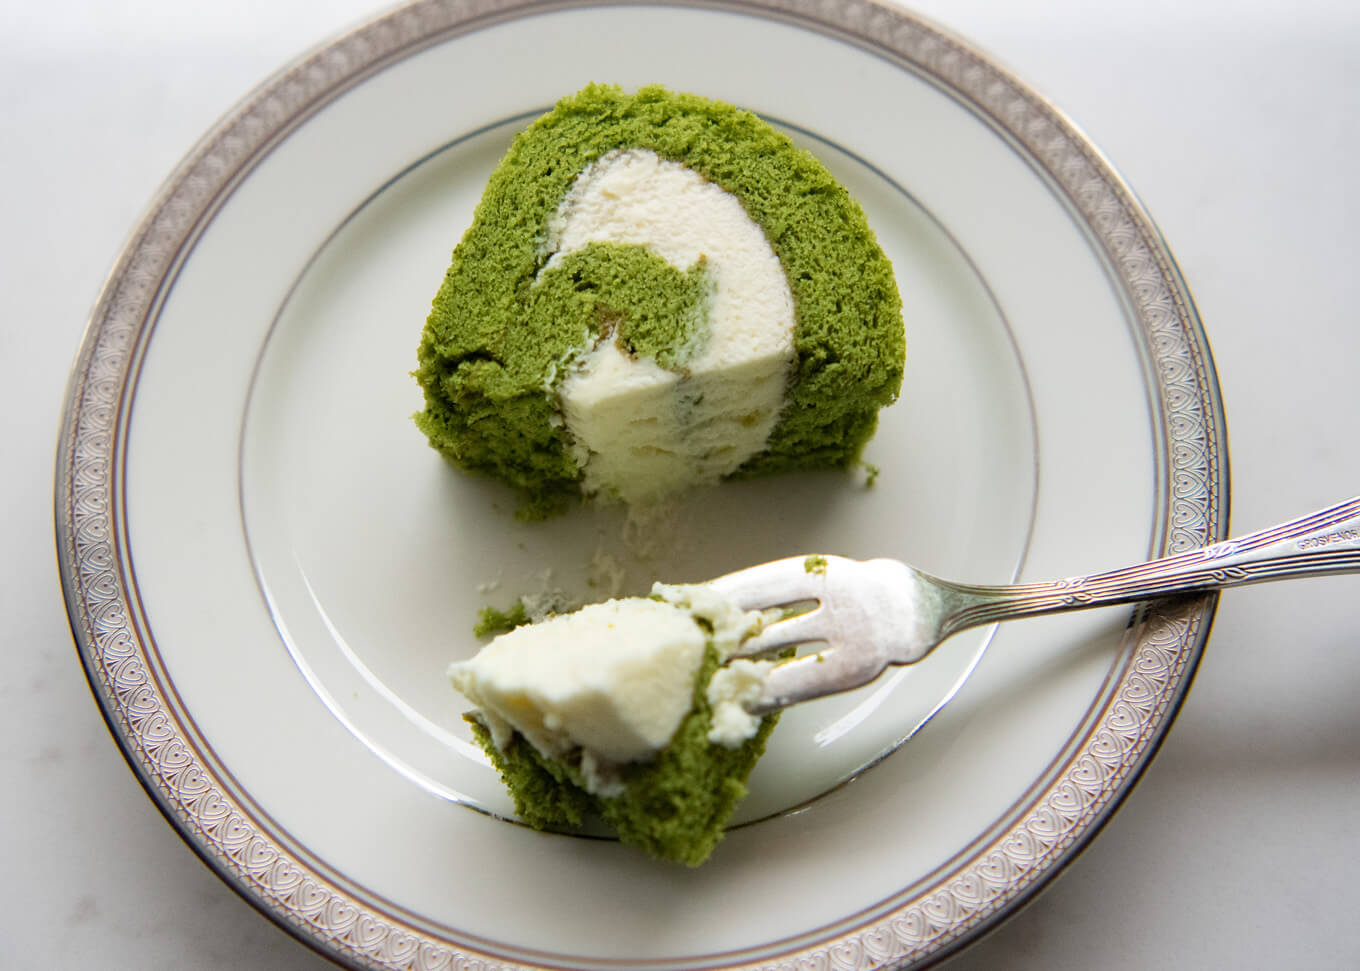
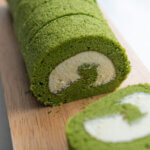
My Matcha Roll Cake is a matcha-flavoured fluffy Swiss roll full of a swirl of contemporary cream. The distinction between inexperienced and white is hanging, and the mix of fluffy sponge cake (nearly like a chiffon cake!) and its elegant sweetness is attribute of Japanese truffles.
Though I don’t often eat dessert after meals or truffles for tea, I don’t thoughts this Matcha Roll Cake as a result of it’s not too candy. Rolling a sheet of sponge full of whipped cream requires a little bit of care, however while you slice it, you’ll be rewarded with a fantastically introduced cake.
In the present day’s cake is made by baking a sq. (or rectangular) sheet of sponge cake, then rolling it with a filling inside. Some roll truffles have many layers of swirl, whereas others overlap solely barely between the start and the top of the roll.
Relying on how a lot filling you set in, the thickness of the sponge, and the size of the cake, the swirl layer can range considerably.
My Matcha Roll Cake doesn’t have many layers of swirl. It overlaps by solely about ⅓, as a result of I take advantage of a beneficiant quantity of filling and the sponge is fluffy moderately than skinny.
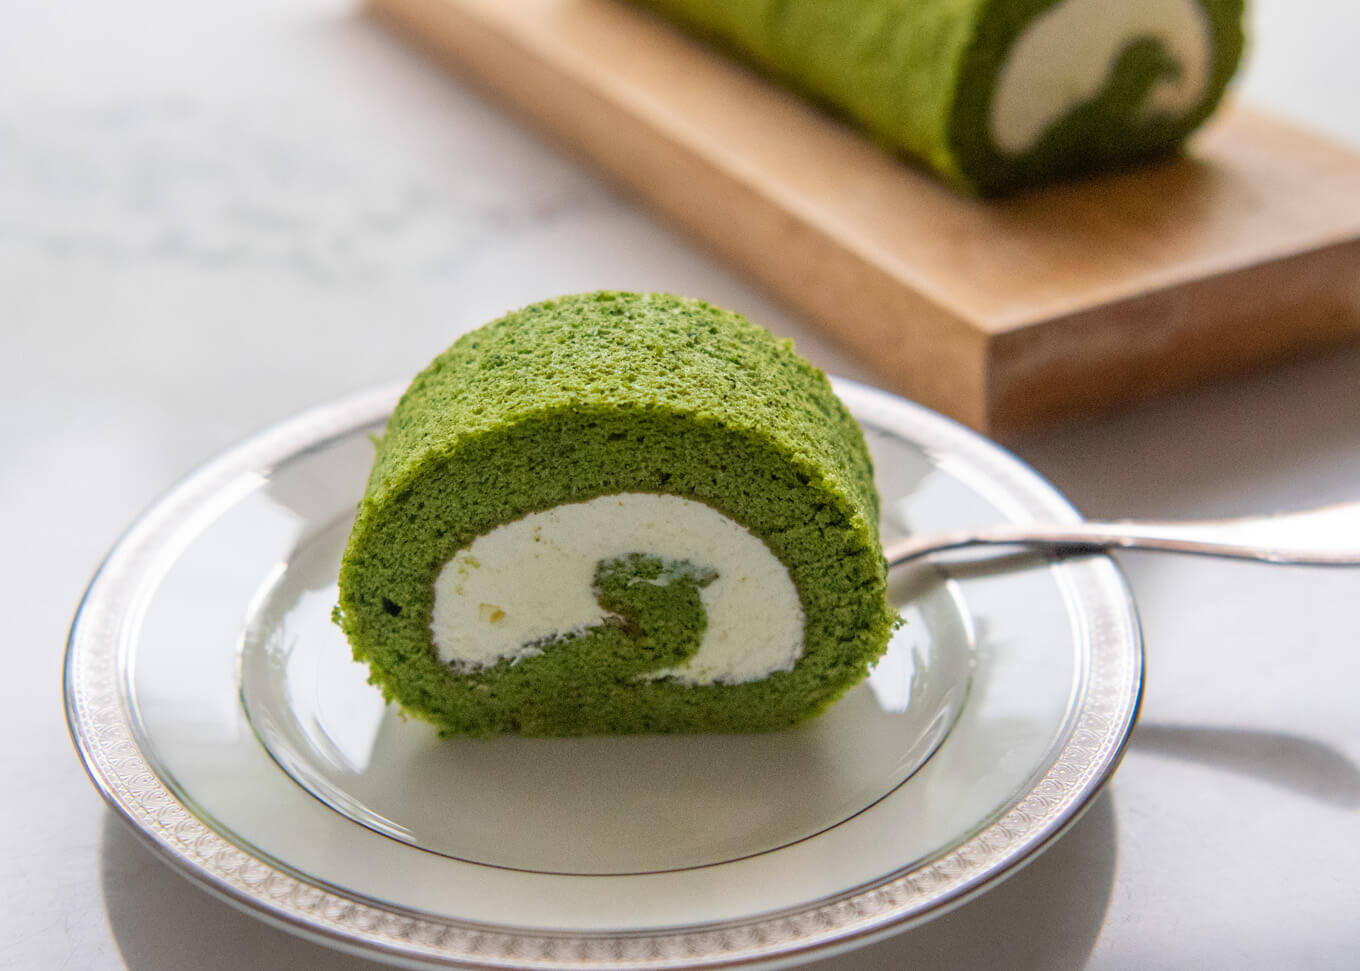
The filling of my Matcha Roll Cake is mildly sweetened whipped cream. Mixed with the slight bitterness of matcha sponge, it creates a refined well-balanced sweetness.
It’s not as tough because it seems!
In the present day’s recipe is kind of lengthy and stuffed with directions and notes. It is because there are just a few tips to creating a profitable roll cake, so I’ve included detailed steerage. In a nutshell, a roll cake is made by baking a skinny sheet of sponge, spreading filling over it, and rolling it up.
frequent downside
The commonest downside when making a roll cake is that the sponge cracks whereas rolling. The primary causes of a sponge cake cracking throughout rolling are twofold. The sections beneath clarify the doable causes of cracking and how one can stop them.
1. The sponge cake is simply too dry to roll
Use substances that assist preserve the cake moist – As you may see within the substances record, I added a small quantity of corn flour/cornstarch together with the all-purpose flour. I additionally added oil to the moist substances.
Keep away from overbaking – The tactic of creating batter is nearly the identical as for my Japanese Strawberry Sponge Cake, however baking time is shorter and the temperature is barely decrease.
I baked the cake at 170°C/338°F (fan pressured) for 16 minutes. This appears to be one of the best mixture of the temperature and the baking time – it cooks by whereas retaining moisture and the floor doesn’t change into too darkish.
Cowl to chill and roll as quickly because it has cooled – As a result of the floor space is bigger than that of tall spherical truffles, moisture evaporates extra rapidly. As quickly because the sponge reaches room temperature, it’s best to roll it.
Extended cooling dries out the cake, which may trigger the cake to crack when rolled.
Cowl the floor whereas cooling.
A barely heat cake is extra moist and simpler to roll, however the cream could soften.
2. An excessive amount of pressure is utilized when rolling the sponge cake.
Use baking paper to roll the cake (see the video) – Place the sponge on a sheet of baking paper to assist information the rolling. Since baking paper is slippery, use a humid kitchen paper/towel or a silicone baking mat beneath it to stop slipping. Belief me – you’ll discover a giant distinction.
Screenshot
Pull the baking paper to help the roll (see the video) – After forming the core on the fringe of the cake, elevate the baking paper and gently pull it ahead to assist the cake roll naturally.
Screenshot
Serving the Matcha Roll Cake is the Enjoyable a part of this recipe!
After you have rolled the cake, you have to chill it within the fridge for at the very least 3 hours. In a single day is OK too.
- Freshly made roll cake is fragile and simply loses its form. Chilling permits the sponge and cream to set collectively and kind a steady roll.
- Resting the cake within the fridge lets the moisture distribute evenly all through the sponge cake, ensuing within the gentle and moist texture.
- Cream companies up by chilling the cake, which makes it simpler to chop the cake cleanly.
What’s in my Matcha Roll Cake (Swiss Roll)
On this recipe, I used a way of beating egg yolks and egg white individually. The eggs I used had been Australian giant eggs, which weighed about 55g / 1.9oz every on common.
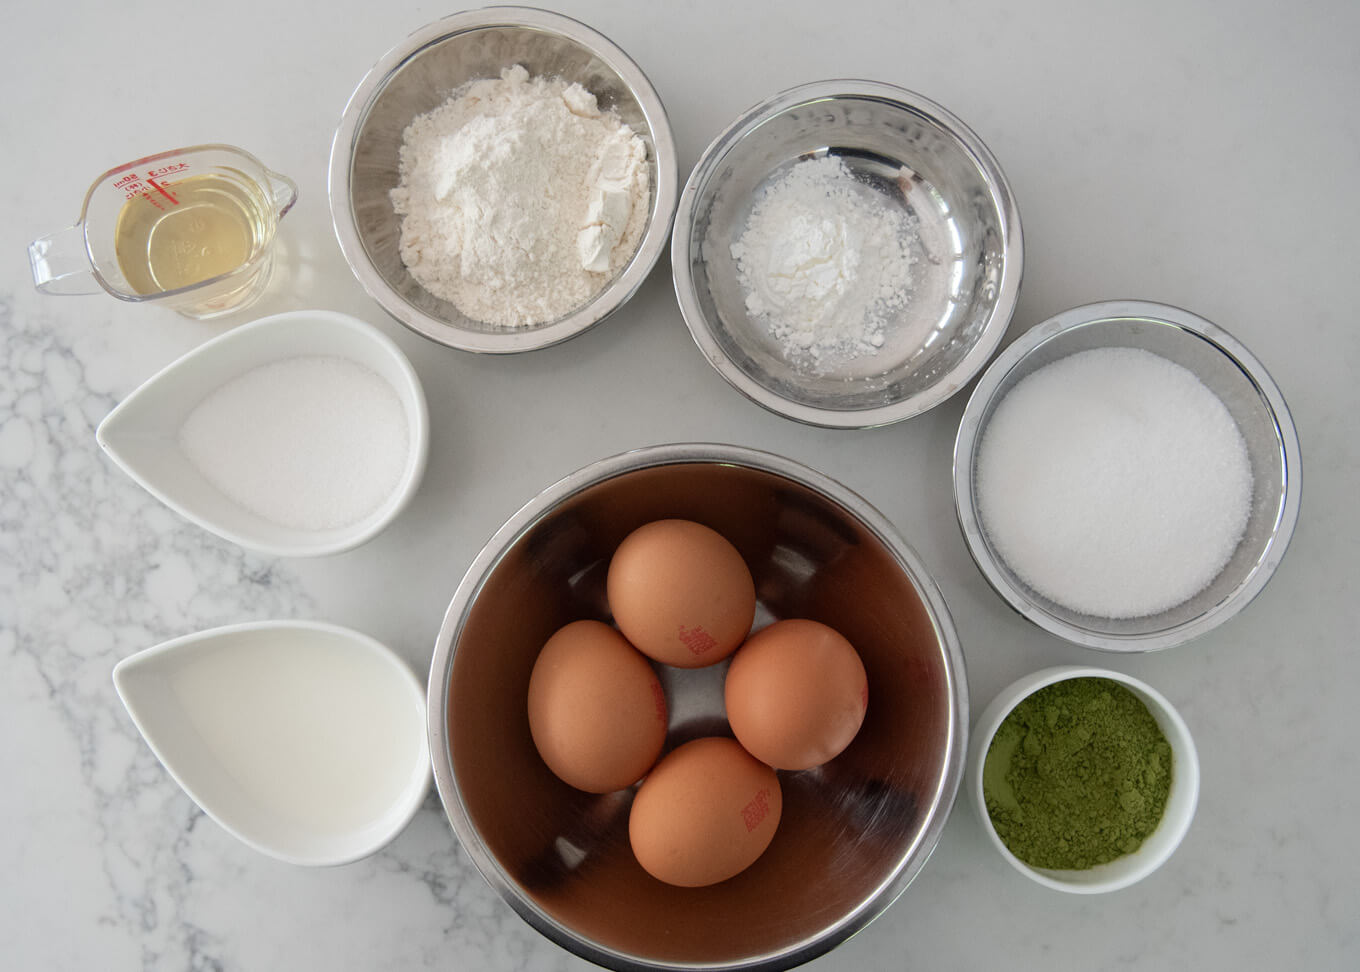
Moist Components
- Egg yolks
- Sugar
- Grapeseed oil, or different neutral-flavoured oil resembling Taihaku sesame oil, or rice bran oil
- Milk.
Dry Components
- Plain flour
- Corn flour / cornstarch
- Matcha powder.
As talked about in my submit Straightforward Matcha Pudding, the color of matcha powder varies relying on the model and high quality. I used ceremonial-grade matcha (used for tea ceremonies) as a result of it has one of the best matcha flavour and a vivid inexperienced color.
Meringue
Filling
- Thickened cream
- Caster sugar.
About The Baking Pan
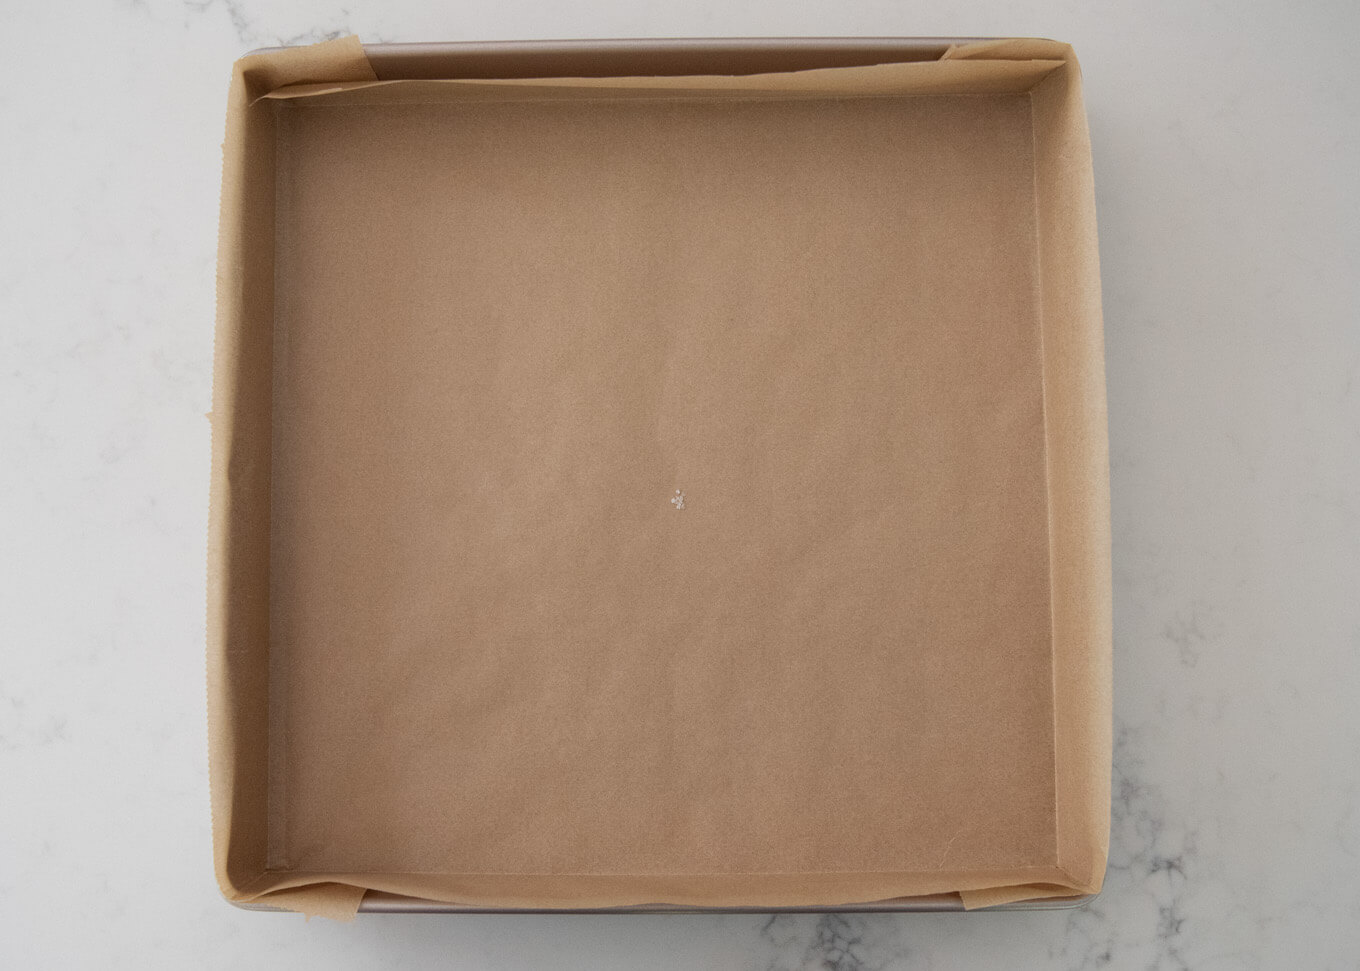
You want a sheet of skinny sponge cake to make a roll cake. I used a 28cm / 11″ sq. cake pan (offered as a roll cake pan), lined with baking paper. I believe it’s the excellent dimension for at the moment’s recipe. Any bigger pans will make a roll too lengthy to deal with. To roll the cake, you have to a sheet of baking paper that’s about 30cm / 12″ vast, which is ideal for a 28cm / 11″ cake.
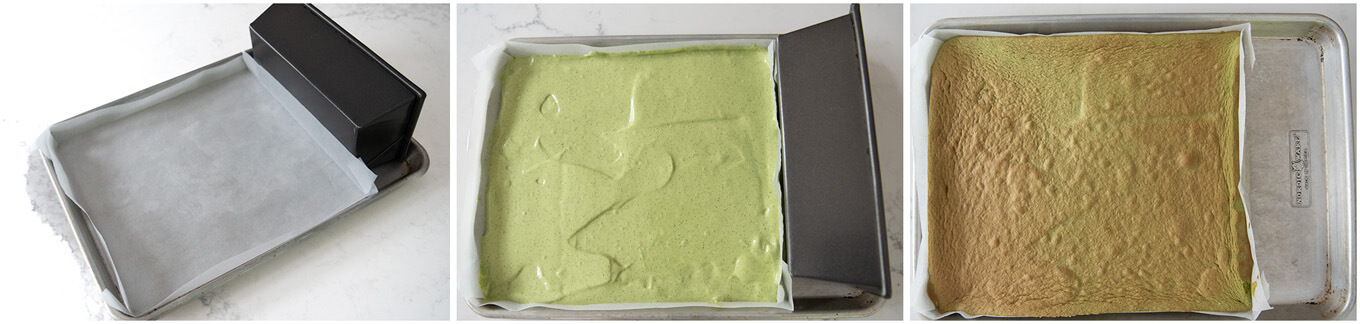
If you happen to don’t have a sq. pan, you should use an oblong baking tray with a slender facet of round 25-28cm / 10-11″. You have to to create a sq. lining to suit the shorter facet. To assist the baking paper with out a rim, place a small tin (resembling a loaf pan) or a small oven-safe ceramic dish subsequent to the paper.
Matcha Roll Cake is a pleasant eye-catching cake. I requested many individuals to style take a look at it and acquired very optimistic suggestions. Constant highlights had been:
- Look
- Gentle and fluffy sponge cake
- Lowered sweetness.
Yumiko![]()
Watch How To Make It
Matcha Roll Cake (Swiss Roll)
Cooling Time & Chilling Time
5 hrs 15 minutes
My Matcha Roll Cake is a matcha-flavoured fluffy Swiss roll with a swirl of contemporary cream. The color distinction of inexperienced and white is spectacular, and the gentle sponge with its elegant sweetness is attribute of Japanese truffles.
See the video.
Recipe Sort:
Dessert
Delicacies:
Japanese
Key phrase:
chiffon cake, japanese cake, Matcha cake, matcha dessert
Serves: 8
:
Components (tbsp=15ml, cup=250ml)
Moist Components
-
4
egg yolks
(word 1) -
35g / 1.2oz (2⅓ tbsp)
sugar -
30g / 1.1oz (2⅓ tbsp)
grapeseed oil
(word 2) -
55ml (3⅔ tbsp)
milk
Dry Components
-
50g / 1.8oz (5 tbsp)
plain flour -
10g / 0.4oz (1 tbsp)
corn flour/cornstarch -
10g / 0.4oz (2 tbsp)
matcha powder
(word 3)
Meringue
-
4
egg whites
(word 1) -
70g / 2.5 oz (4⅔ tbsp)
sugar
Filling
-
250ml (1 cup)
thickened cream -
20-25g / 0.7-0.9oz (1⅓ – 1⅔ tbsp)
caster sugar
(8-10% of the load of the cream)
Directions
-
Line a 28cm x 28cm / 11” x 11” baking tray with baking paper on the underside and the edges (word 4).
Batter
-
Combine all of the Dry Components properly, however gently, in a small bowl. Matcha powder is so mild that it’ll scatter in every single place if you happen to combine it vigorously.
-
Place the egg yolks in a medium bowl and blend. Add sugar and beat at excessive pace till the combination turns into pale cream in color and thickens. Draw an infinity image on the floor of the batter with the beater. If the sample stays momentarily, it’s prepared.
-
Add ¼ of the oil at a time to the yolk combination, beating at excessive pace every time to make sure that the oil is absolutely integrated.
-
Scale back the pace of the beater to sluggish, then add milk in 4-5 batches, beating properly every time after including the milk.
-
Sieve the Dry Components combination and add it to the egg yolk.
-
Utilizing a whisk, gently incorporate the flour combination into the egg yolk combination. Begin from the centre of the bowl in a round movement, regularly widening the circle. This helps stop lumps from forming.
-
When the batter is blended properly, set it apart.
-
Flip the oven on and preheat it to 170°C / 338°F (fan pressured), with the rack within the center place.
Meringue
-
Beat the egg whites in a big bowl. When bubbles kind and the combination turns into whitish, add ⅓ of the sugar and beat for 10-15 seconds. Repeat twice including one other ⅓ of the sugar every time, beating after every addition of sugar.
-
Proceed to beat till the meringue types medium peaks (while you elevate the beater/whisk, the height will kind however curl barely on the tip, see the video).
Cake Combination
-
Utilizing the whisk, combine the batter barely, then switch about ⅓ of the meringue to the bowl with the batter.
-
Fold the batter and meringue combination gently utilizing the whisk. Then switch the batter to the bowl with the remaining meringue (use a spatula to scrape all of the batter out of the bowl). It’s okay if a small quantity of meringue is just not absolutely integrated within the batter at this stage.
-
Fold the combination utilizing the whisk till principally mixed. Then change to a spatula and proceed folding till there is no such thing as a hint of white meringue. Don’t overmix, as it should break the small air bubbles, leading to a flat, dense sponge cake.
Baking & Cooling
-
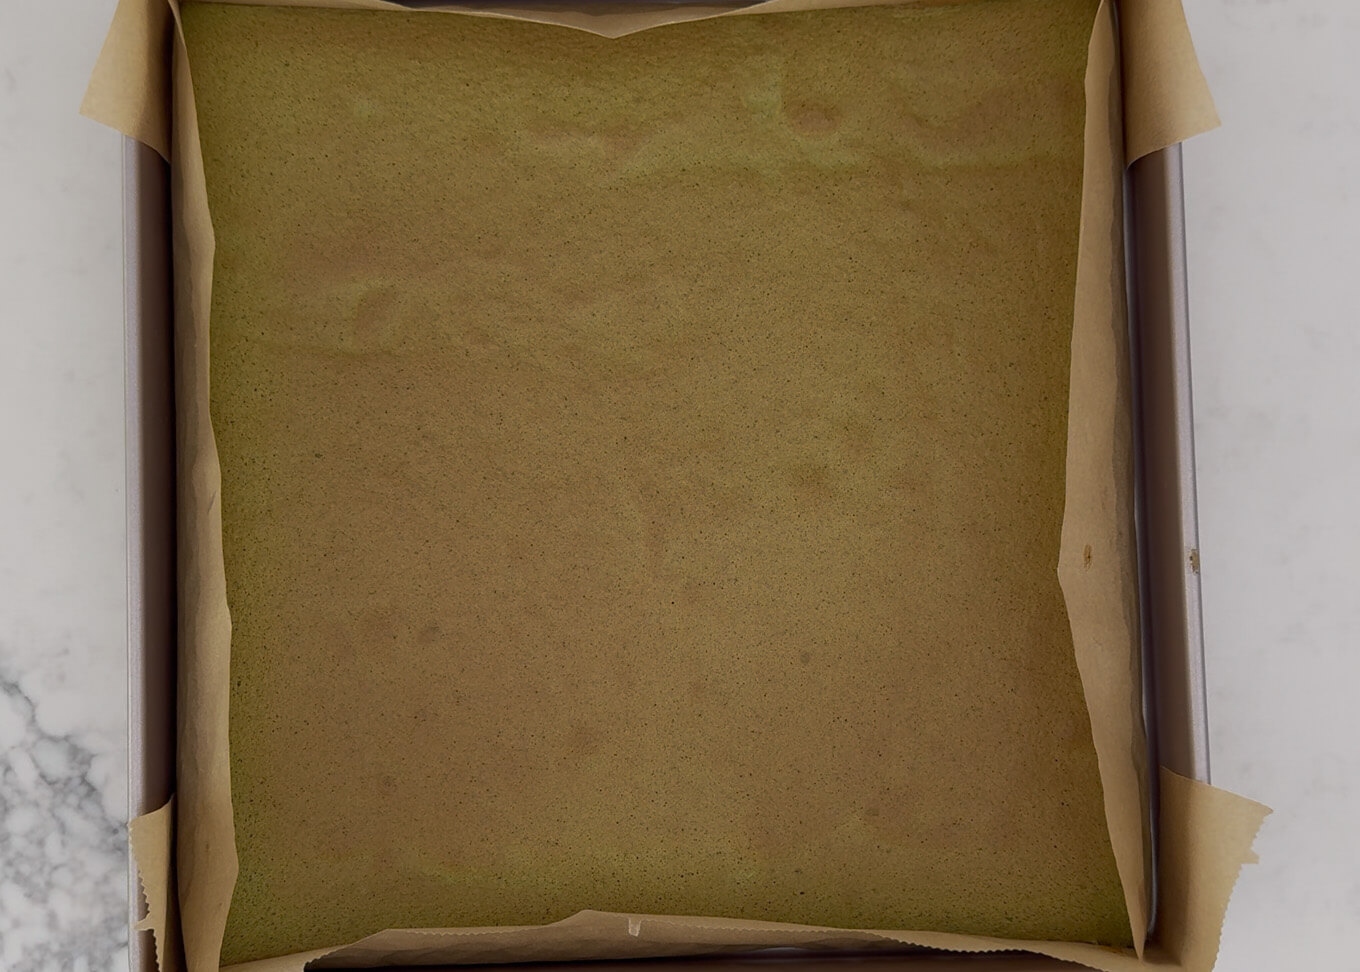
Switch the batter to the baking tray lined with baking paper. Utilizing a scraper, unfold the batter, leveling the thickness. Be certain that every nook of the tray is full of the batter (word 5).
-
Drop the tray from a few 10cm / 4” peak a few occasions to take away air pockets within the batter.
-
Place the tray within the oven on the center shelf and cook dinner for 16 minutes.
-
Take away the tray from the oven and switch the cake, together with the baking paper to a cooling rack.
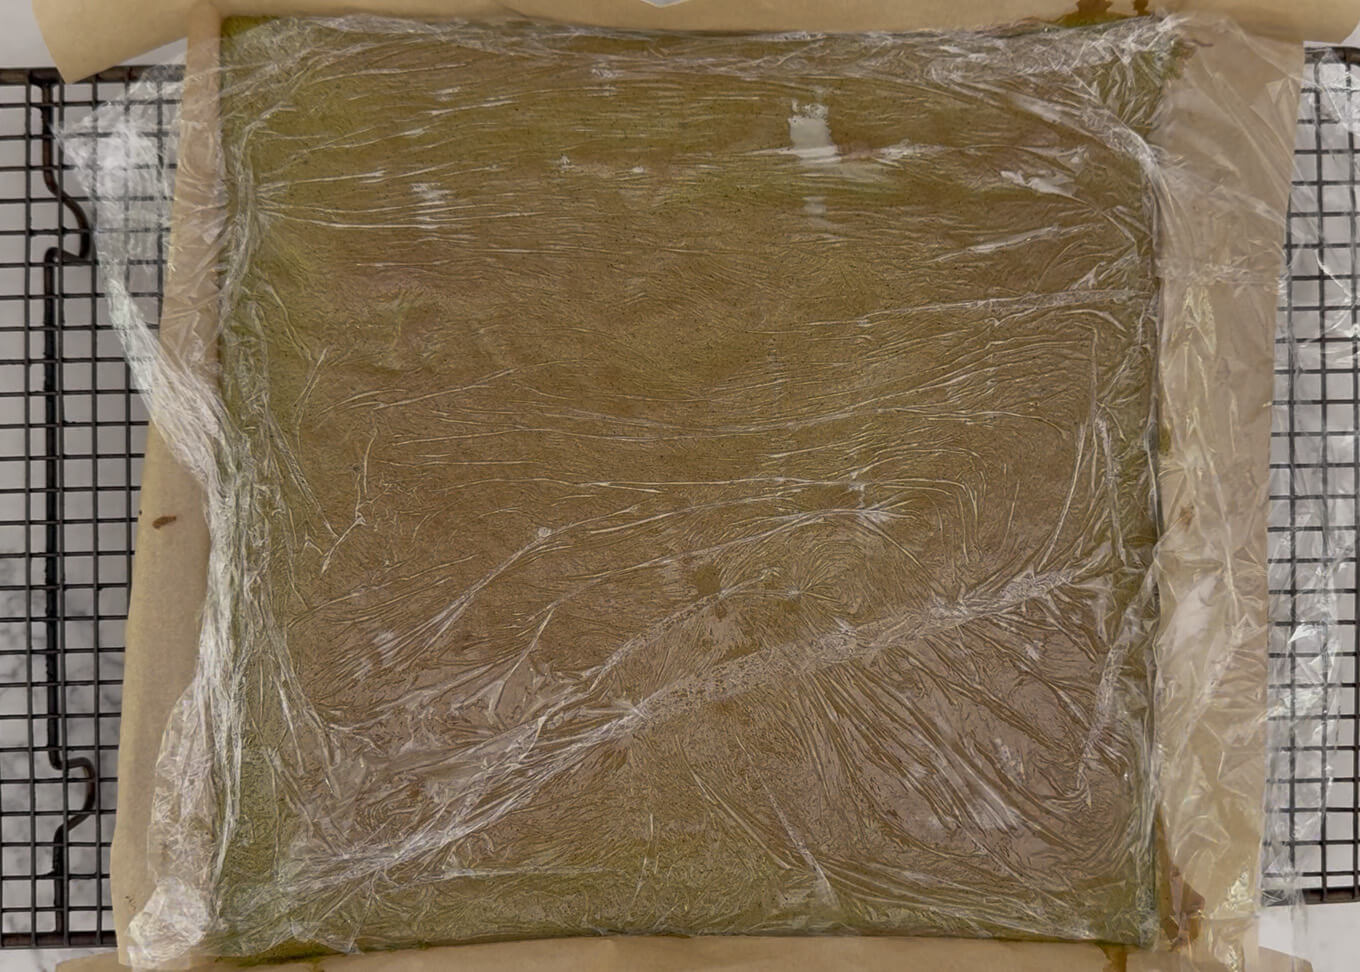
-
Shortly cowl the floor with cling wrap (to retain moisture), then flip the cake the other way up in order that the baking paper is on prime. Be certain that all the floor of the cake is roofed. Let it cool to room temperature.
Filling (do that whereas the cake is cooling)
-
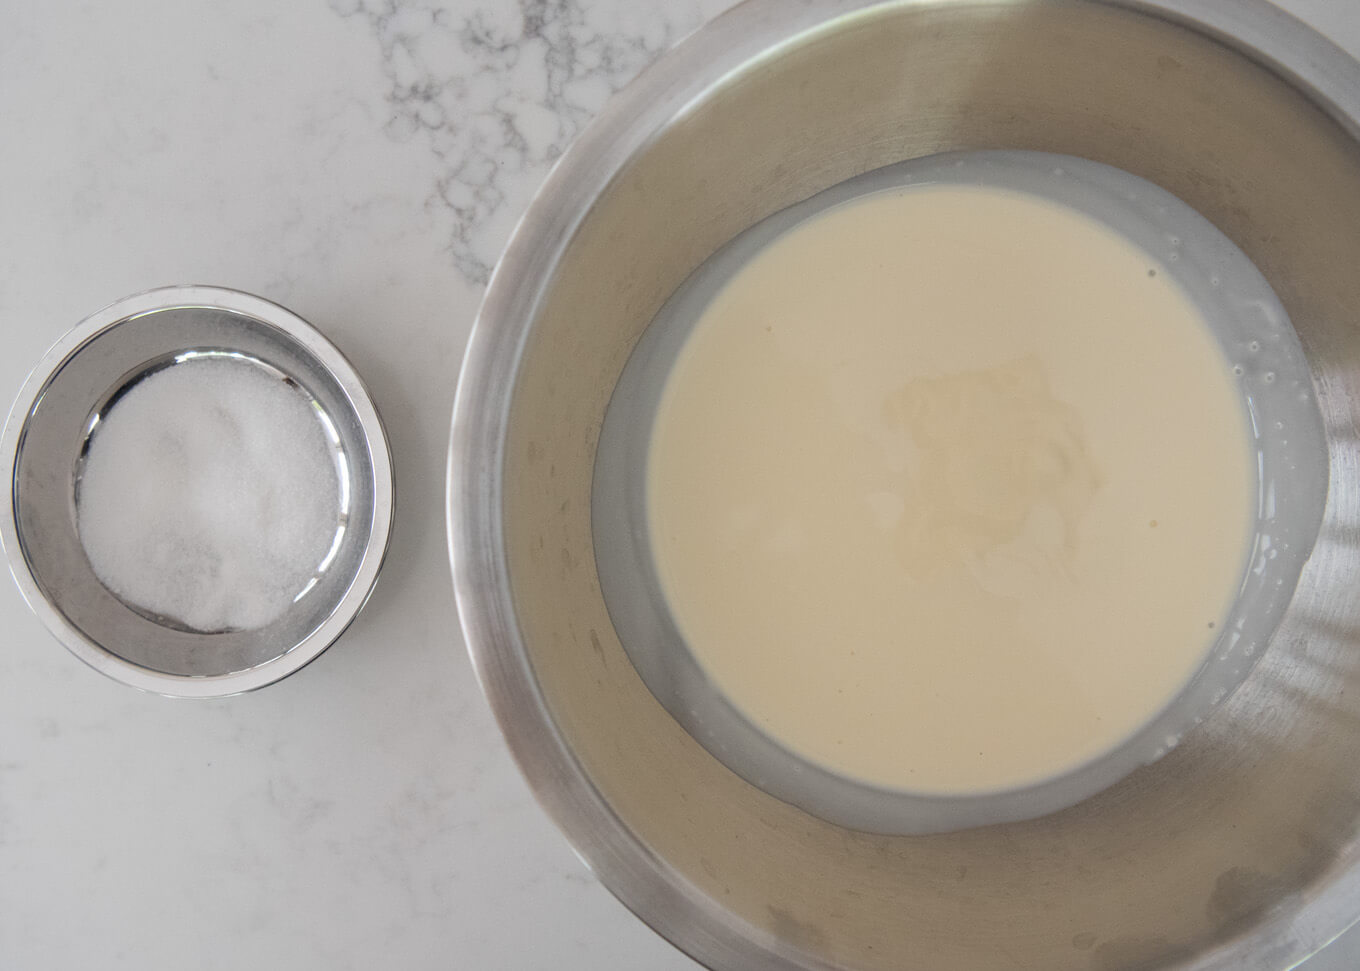
Mix the Filling substances in a medium bowl and beat with an electrical beater or whisk.
-
Beat the cream till it turns into barely stiffer than the standard whipped cream used for cake ornament (word 6).
Getting the Roll Cake Prepared
-
Flippantly moist 4 sheets of kitchen paper and place them on the workbench, forming a big sq. (or use different materials as per word 7). This may cease the baking paper from slipping when rolling the cake.
-
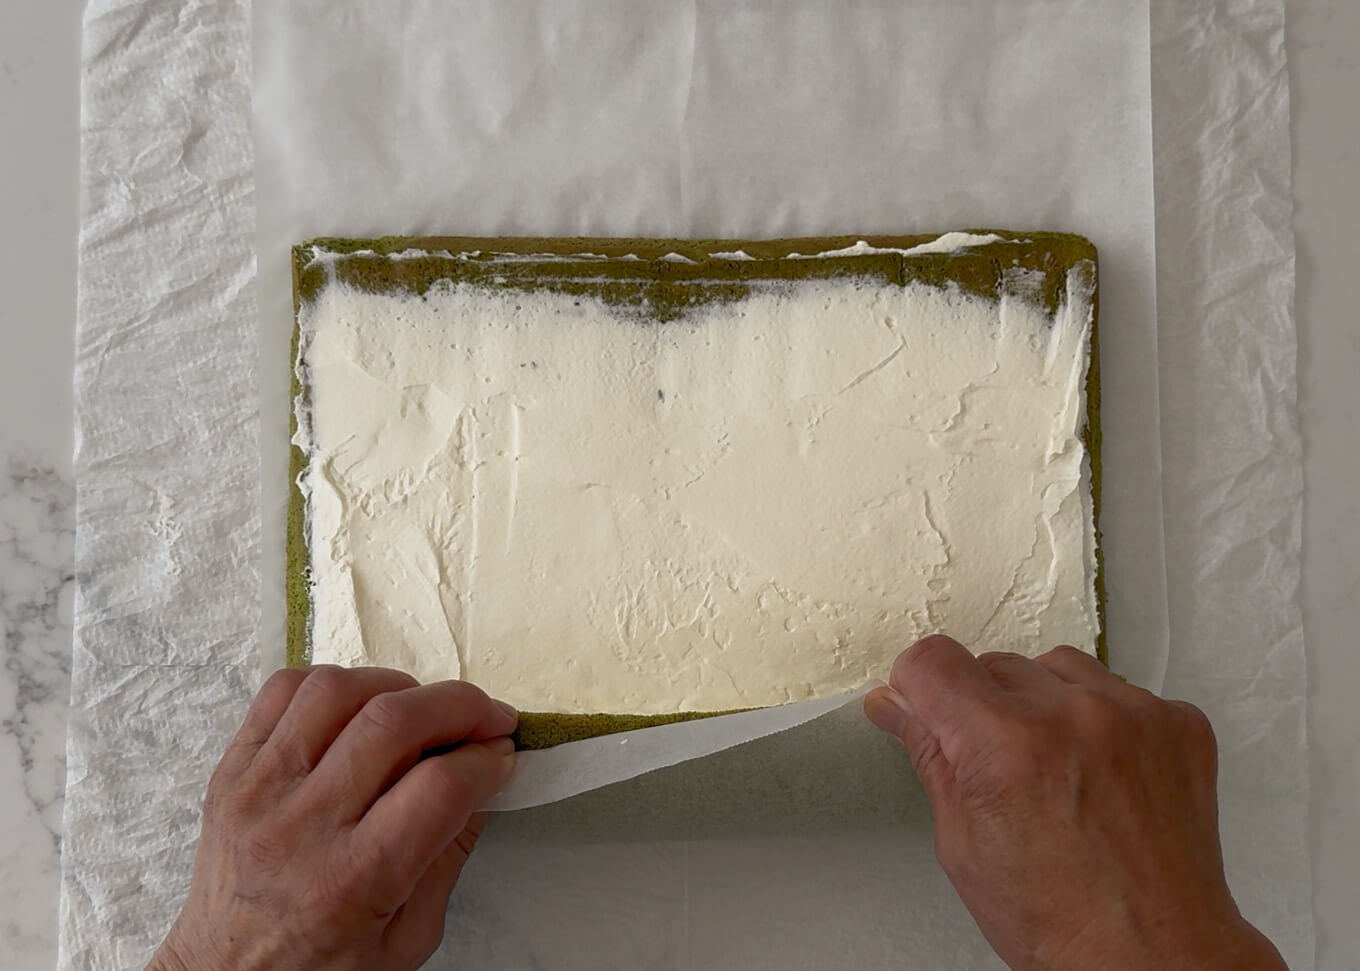
Gently take away the baking paper from the cake.
-
Reduce a brand new piece of baking paper twice the size of the sponge cake and place it over the cake. Align the sting of the paper to the facet of the cake farthest from you, permitting the paper to increase 2-3cm / ¾-1⅛” past the cake.
-
Slide the cake, with the cling wrap and baking paper intact, off the rack and transfer it to the work bench.
-
Choose up the far fringe of the cake along with the baking paper and cling wrap. Flip the cake the other way up by bringing the lifting edge in direction of you. The cling wrap ought to now be on prime.
-
Gently take away the cling wrap (it’s okay if a part of the brown floor comes off), then switch the baking paper with the cake onto the moist kitchen paper. The sting of the cake closest to it’s best to sit 2-3cm / ¾-1⅛” within the sting of the baking paper (word 8).
-
Put all of the whipped cream in the midst of the cake. Utilizing an icing spatula, unfold the cream, guaranteeing the thickness of the cream is even (word 9).
-
Wipe off about 2cm / ¾” of the cream alongside the sting farthest from you and reserve the eliminated cream.
Rolling a Cake
-
Draw a line with the icing spatula about 1cm / ⅜” from the sting closest to you, calmly reducing into the sponge. This may help you simply fold the sting of the sponge and kind the core of the roll cake.
-
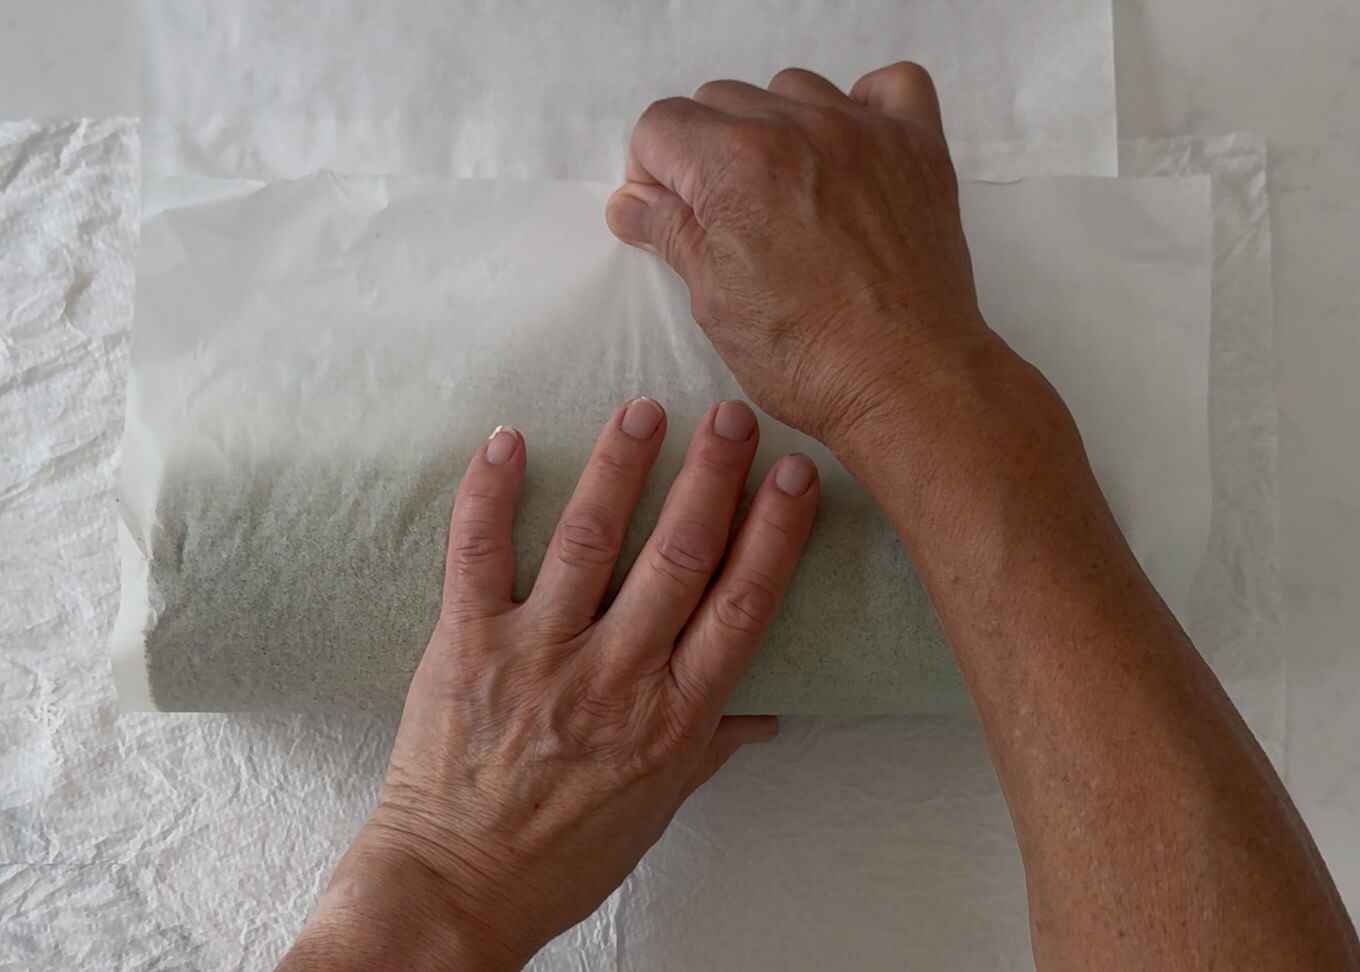
Carry the paper closest to you and gently fold the sting of the cake alongside the road you simply drew. If crucial, use your fingers to fold the cake firmly to create the place to begin of the roll.
-
When the sting of the cake reaches the highest, pull the paper ahead, which can roll the cake. You might want to position your fingers on prime of the cake initially while you begin rolling. The paper ought to be held parallel to the workbench all the way in which till the top of the roll.
-
When the rolled cake reaches the top and the seam is on the backside, unroll the paper and fill either side of the roll with the leftover cream in order that the cream will likely be crammed to the sting with out a hole.
-
Put again the paper over the rolled cake once more and make sure the seam is on the backside.
-
Place a protracted ruler (or one thing comparable) on prime of the paper that the roll cake is wrapped in, in order that the highest a part of the baking paper meets the underside half. Then pull the paper that’s protruding from beneath the roll cake whereas pushing the ruler inward. This tightens all the roll, leading to a neatly formed, spherical roll cake.
-
Leaving the paper tucked in by the ruler, proceed rolling the cake with the paper till the appear is on the backside.
-
Cowl each edges of the roll cake with cling wrap to stop it from drying out, then chill it within the fridge for at the very least 3 hours. In a single day can also be OK.
Serving
-
Unwrap the paper. Reduce about 1cm / ⅜” off each ends of the roll (word 10).
-
Clear the knife utilizing a humid towel or kitchen paper after every minimize.
-
Reduce the roll cake into 8 slices and serve.
Recipe Notes
1. I used giant eggs, which weighed 55g / 1.9oz on common. In Australia, a carton of enormous eggs (a dozen) weighs a minimal of 600g / 1.3lb.
My egg yolk was 72g / 2.5oz and the egg whites 158g / 5.6oz. It doesn’t matter even when the load of the yolk and whites is just not the identical as mine, so long as the common weight of the eggs is near 55g/ 1.9oz.
2. Any oil with a impartial flavour is ok. Different oils you should use embrace Taihaku sesame oil and rice bran oil.
3. If you happen to can, use ceremonial-grade matcha (used for tea ceremonies) as a result of it has one of the best matcha flavour and a vivid inexperienced color.
4. I discover that the scale of the sponge cake baked on this dimension tin is the best to make a roll cake. If you happen to don’t have one, you should use an oblong baking tray whose shorter facet is 25cm-28cm / 10-11″. Word 11 explains how one can make a sq. sponge cake utilizing an oblong baking tray.
5. Use the sting of the scraper to push the batter into every nook of the tray first, then alongside the edges, earlier than levelling all the floor.
6. Whipped cream ready for cake decorations is simply too gentle to make use of inside a roll cake as a result of the cream can ooze out when rolling the sponge. It is advisable to whip the cream a little bit longer in order that it turns into firmer, however not a lot that it turns into a butter-like texture.
7. If in case you have a big silicone baking mat, that may be excellent (however I don’t have one). You can too use a calmly moist kitchen towel on the workbench.
8. It is very important place the cake 2-3cm / ¾-1⅛” from the sting of the baking paper. This makes it simpler to start out rolling the cake.
9. I unfold the whipped cream from the centre to every nook of the cake, then to the edges to cowl all the floor earlier than levelling the thickness of the cream. You may after all use your individual technique, so long as the cream has a constant thickness.
10. There may be nothing flawed with the ends of the roll cake, besides that the sponge tends to be drier (being the sting) and the floor uneven. In case you are serving the roll cake at residence with your loved ones, it’s fairly alright to not trim each ends.
11. You have to an oblong baking tray and a loaf pan (or one thing comparable that may go within the oven). The width or the peak of the loaf pan ought to be just like the distinction between the quick facet and the lengthy facet of the tray.
Measure the size of the quick facet of the tray and make a sq. lining (backside and sides), imagining that the tray is a sq.. The peak of the facet made with the baking paper ought to be 3-4cm / 1⅛-1 9⁄16 “
Place the liner contained in the tray, shifting it to at least one facet. Then place the loaf tin subsequent to the sting of the baking paper in order that it acts as a wall supporting the paper. Bake the cake with the loaf tin in place. (Please see the images within the submit)